Oct 20, 2017

how to use Angular CLI to create a new project and deploy it

I want to show you how to use Angular CLI to create a new project and deploy it even if you've never used Angular before.
To install Angular CLI, just run the following command:

    $ npm install -g @angular/cli
Once it's installed you'll be able to run it from the command line using the ngcommand. When you do, you'll see a lot of output, but if you scroll back, you should be able to see the following:

    $ ng --version
If everything installed correctly, you should see the current version output to your terminal. Congratulations!
Now that we have Angular CLI and its dependencies installed, let's use this tool to create our first application.
Open up the terminal and run the ng new command to create a new project from scratch:

    $ ng new angular-hello-world
Once you run it, you'll see the following output:

    installing
      create .editorconfig
      create README.md
      create src/app/app.component.css
      create src/app/app.component.html
      create src/app/app.component.spec.ts
      create src/app/app.component.ts
      create src/app/app.module.ts
      create src/assets/.gitkeep
      create src/environments/environment.prod.ts
      create src/environments/environment.ts
      create src/favicon.ico
      create src/index.html
      create src/main.ts
      create src/polyfills.ts
      create src/styles.css
      create src/test.ts
      create src/tsconfig.json
      create .angular-cli.json
      create e2e/app.e2e-spec.ts
      create e2e/app.po.ts
      create e2e/tsconfig.json
      create .gitignore
      create karma.conf.js
      create package.json
      create protractor.conf.js
      create tslint.json
    Successfully initialized git.
    Installing packages for tooling via npm.
    Installed packages for tooling via npm.
Note: the exact files that your project generates may vary slightly depending on the version of @angular/cli that was installed.
This will run for a while while it's installing npm dependencies. Once it finishes we'll see a success message:

    Project 'angular-hello-world' successfully
created.
There are a lot of files generated! Don't worry about understanding all of them yet. We explain every file here throughout the book. Through the chapters there we'll walk through what each one means and what it's used for.
For now, let's just run the app and then deploy it

Running the App

To run the app, type the following:

  $ cd angular-hello-world
  $ ./node_modules/.bin/ng serve
Then wait a minute and you should see:

  ** NG Live Development Server is running on http://localhost:4200 **
  ...
  webpack: Compiled successfully.
This means your first Angular app is running! You can view it in your browser by opening http://localhost:4200.
Viewing your app on localhost
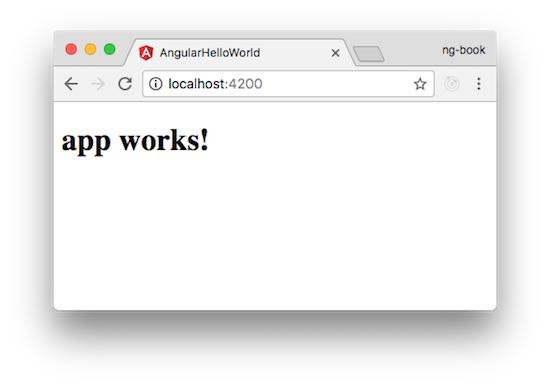
Viewing our App on Localhost
What's happening here is that Angular CLI has compiled our code and started a development server on our machine. Now, let's take this code and put it on the internet where everyone can see.

Deploying the App

Deploying our app is the act of pushing our code to a server, where it can be accessed by others.
Broadly speaking, the idea is that we're going to:
  • compile all of our TypeScript code into JavaScript (which the browser can read)
  • bundle all of our JavaScript code files into one or two files
  • and then upload our JavaScript, HTML, CSS, and images to a server
Ultimately, this Angular app is an HTML file that loads JavaScript code. So we need to upload our code to a computer somewhere on the internet.
So first, we build our Angular app:

./node_modules/.bin/ng build --target=production --base-href '/'
This command tells the ng tool to build our application for a productionenvironment. We also set the --base-href to a single slash /.
This command will run for a little while and when it finishes you should have a distfolder on your disk.

$ ls dist/
favicon.ico
index.html
inline.95a6cb571dbc2cfcb6a0.bundle.js
main.91fb0238219cb9a1d089.bundle.js
polyfills.5aae015f16e5b66f61e9.bundle.js
styles.d41d8cd98f00b204e980.bundle.css
vendor.4efaf64fc64d0c1e3642.bundle.js
These files are the full compiled result of your app. Notice that there is a long string of characters in the middle of each file such as:

main.91fb0238219cb9a1d089.bundle.js
Those characters are a hash of the content (and may not match on your computer). If you look at each file, you can see that we have some icons, the index.html, a main.js, a polyfills.js, a vendor.js, and some styles.css.
Now all the need to do is upload these to our server.

Uploading to a Server

There are lots of ways to host your HTML and JavaScript. For this demo, we're going to use the easiest way possible: now.
If you don't want to use now, you're free to use whatever method you want. For instance, you can host sites on Heroku, AWS S3, upload files to your own server via FTP, etc.
The important thing is that the server exposes all of the files in our distfolder onto the internet.

Installing now

We can install now using npm:

npm install -g now
To deploy a site with now is very easy:

cd dist # change into the dist folder
now
The now command should ask you a couple of questions (such as your email address) and you'll need to check your email and click the link inside.
After you've confirmed your account (or if you had one already), now will upload your code and then give you a URL to view to see your application.
Visit that URL and view your app. If it works, try sending the URL to a friend!
Viewing your app on now
Viewing our App on The Internet
Congratulations! You've built and deployed your first Angular app!
Of course, there is a lot more to learn, but at least now we know that whatever we build can be deployed live online!
Next time, we'll chat a bit more about how Angular uses components to structure apps.

Oct 16, 2017

Angular 4 – Tutorial from scratch


Hello everyone, Angular,  as you may already know is one of the powerful and popular JavaScript frameworks. There are currently 3 versions of Angular, in which Angular 4 is the latest. Angular 2, the second version, was completely rewritten to provide more flexibility and more ease in development, then AngularJS, the first version. Angular 4 is the update to the Angular 2 and has the backward compatibility support. Angular is used to create SPA which stands for Single Page Application. The SPA helps in smooth user experience as the page gets loaded at one time only and routing is also done on the same page removing the page to reload.
So, this is the quick brief about the Angular framework, as the Angular 4 is the latest, there are very few tutorials on the internet, most of them are not complete or paid. So, I thought of writing a complete tutorial for Angular 4 and will be trying to cover all the features of Angular 4.  To start with Angular 4, knowledge of AngularJs or Angular 2 is not required at all. It will be helpful if you some experience with HTML, CSS and JavaScript. Also though the Angular 4 uses TypeScript, it is not required to learn TypeScript, JavaScript knowledge will be enough.

Getting Started

With Angular 2, Angular CLI was introduced which stands for Angular Command Line Interface. Angular CLI runs on node JS and helps in the quick creation of the new Angular application. To start creating an application first we need to install Angular CLI and for that, we need to have Node js. To install Node js click on the link  https://nodejs.org/en/download/current/ and install for your platform. After installing Node js open the command terminal, as I m using windows so I’ll open a command prompt. To install Angular CLI type
npm install -g @angular/cliwhere npm stands for Node Package Manager, -g for global to use it globally in the system. To check if Angular CLI is installed properly you can use command
ng –versionto check the version.

Creating Angular 4 Application

Now we can start creating our Angular 4 application. To create a new project, we will be using Angular CLI and will type the command
ng new new-angular-appThis command will create the default structure and files with needed for the development of the project. It will take some time to download the files. After it is completed you will have a configured Angular 4 project. Now let’s see the structure and files inside the folder. I ‘ll be using the Microsoft Visual Studio Code IDE for my development as its free and powerful. Let see the created directories and files for our new angular app.
Inside the root directory, you’ll see 3 folders, e2e which is an end to end testing which we ‘ll be using later. The second one is the node_modules folder which contains the angular files and other required classes for development. We don’t have to do anything in this folder. The last one is the src or the source folder which contains the development files and index.html.
We have some other files which we may not require as default configuration is sufficient for running the application. We ‘ll be doing our development inside the src folder only. In this app, the folder contains the components. Images and other media files can be stored in assets  folder. Environment variables configurations are in the environment folder which as of now we don’t need to change. Out of the other files, we will be using, index.html (rarely) for few imports of style libraries, style.css for application level styling and favicon.ico to change the favicon. Others we can leave to default.

 Inside the app folder except for app.module.ts  all other files will be there for every new component we create. In Angular we can create different components for a different purpose and include it using the selector, we will get in detail later. Every component as app.component.css, which contains styling instructions, app.component.html, which contains the HTML code for that component, app.component.ts, which acts like and controller class and all the javascript code related to events and functionalities are written in this file. For component level unit testing app.component.ts, is there. During development, we will be using various dependencies for Angular libraries which need to imported and added to app.module.tsfile.
This was about the structure of Angular 4 files, now lets start and check the app is working or not. Angular CLI provides a server which we can start and check the output in the browser. To start that go inside the application folder in command prompt and type ng serve this will compile and deploy the app on the local server, which can be accessed through http://localhost:4200 (to change port number ng serve –port_no ). So let’s start the app and see if it is working fine.
Application compiled successfully. Let’s see the output.
As you can see the default page, means the app server is working fine. In the next tutorial, we will start development of a cool and reactive app using Angular 4 and Angular Material. Before that let’s understand some basics of Angular 4

Angular 4 new features and improvements

The Angular team has just released Angular 4. This is a major release which has some breaking changes!
Angular 4 new features
Angular 4 is backward compatible with Angular 2!
Angular 4 logo
Here are some great features and improvements:

Faster and smaller

Angular 4 is now faster and smaller!

View engine now has less code

Angular team introduces a new view engine system, which can reduce the size of generated code for our components by around 60%!

Animation has been moved out to a separated package

Angular animation package will not be in your production code anymore. You can still import and use it whenever you want.

ngIf now has a new else statement

Now you can use else statement with ngIf.
<div *ngIf="activated; else hidden">

</div>
<ng-template #hidden>Your hidden code</ng-template>

Angular Universal

You can now render an Angular app on the server using Angular Universal.

Upgrading to Angular 4

If you're using Angular 2, upgrading to Angular 4 is very easy. You just need to run these commands:
For Mac users:
npm install @angular/{common,compiler,compiler-cli,core,forms,http,platform-browser,platform-browser-dynamic,platform-server,router,animations}@latest typescript@latest --save 
For Windows users:
npm install @angular/common@latest @angular/compiler@latest @angular/compiler-cli@latest @angular/core@latest @angular/forms@latest @angular/http@latest @angular/platform-browser@latest @angular/platform-browser-dynamic@latest @angular/platform-server@latest @angular/router@latest @angular/animations@latest typescript@latest --save
You can view more features and the release note at:

Get the Angular 4 book for free!

Because Angular is using semantic versioning for Angular releases, Angular 4 is actually an improved version of Angular 2!
If you know Angular 2, you'll know how to use Angular 4!